A 1-year update post on our current renovation house.
I’m not sure which way to put it. Because it seems like we’ve been working on this house for a looooong time and we’re just so used to living here now. But, it’s also ONLY been 1 year since we bought this house and started renovating it! 1 year! And, we’ve only lived here for 8 months. 8 months!
We’ve gotten plenty done in that year. And it’s been a journey. And, we’ve been trying to remind ourselves that, at this point in our last renovation, we were so much further behind – as one way of putting it, another way would be to say we just didn’t have as much done by the 1-year mark – because there is no real timeline, just us, not wanting to live in a renovation forever. (At the last house we also had less of a choice … less experience, less money, less time.)
If you want to see the original tour of our current house, you can find that here, in a post from last year.
(And for fun, if you want to see the 1-year update from our first house renovation, you can find that here – see how much quicker we’ve been able to update our current house!)
Let’s get to what this post is really about … the finished renovations, the still-to-do lists, and those before-and-after pictures. 😊
So, I’ve organized this post to highlight where we currently are, and pictures to reflect that (ALL afters). If you’re just interested in the Before & After … click here to head over to the Cincinnati Home Tour page to scroll through those pictures.
OR, just scroooooolllllll all the way to the bottom of this post, where you’ll find a slideshow of all those pics.
Whole house projects
- Scraped the ceilings smooth – no more stamping/pattern! (& then cleaned, and cleaned, and cleaned, and cleaned forever)
- Removed all previous flooring – carpet, padding, vinyl stick flooring, tiling – and installed new subfloor and wood floors throughout the main level, upstairs hallway, and master bedroom; and refinished the wood floors in the 3 guest bedrooms and the stair treads
- Primed and painted ALL of the baseboards
- Replaced ALL of the old almond-colored electrical outlets and light switches, and the covers, with new, white ones
- Replaced the Heat Pump unit
Foyer
- Removed the wallpaper & mudded the walls
- Spackled cracks & holes
- Re-wallpapered
- Caulked all of the trim
- Painted everything – walls, ceiling, inside the closet, closet doors, all of the trim, stair fronts, railings, etc.
- Installed new light fixture
- Installed new door hardware (front door & closet)
- Installed new trim on stairs
- Replaced doorbell (although still not working)
- Hung art
Still to do … replace the lower stair railings & actually install a hand railing, fix the doorbell, replace the front door, … and maybe another piece of art or a plant?

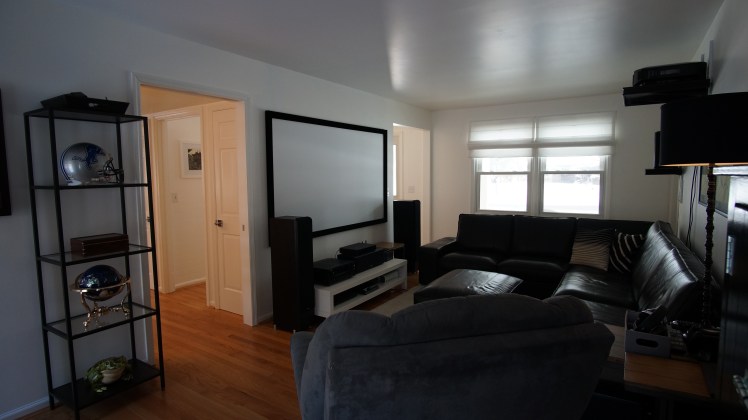
Living Room
- Spackled cracks & holes
- Caulked all of the trim
- Primed and painted trim, walls, and ceiling
- Removed large, oversized draperies and replaced with roman shades
- Removed the chandelier and replaced with modern ceiling fan & light
- Installed cable & internet (haha … because the lines had literally never been run to the house?!?)
- New furniture – couch, tables, TV & stand, and lamps, etc.
- New art hung on walls
Still to do … replace the ottoman in front of the sectional, replace the polka dot chair & ottoman, maybe a couple of throw pillows?


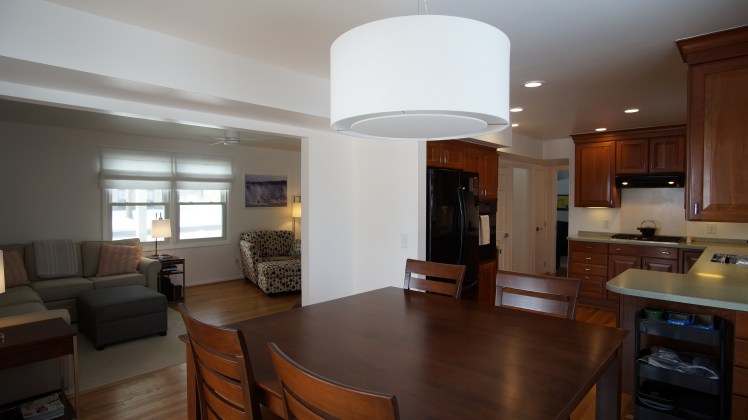
Kitchen & Dining Area
- Widened the doorway between the LR & eating area by 1’ on each side
- Stripped all of the wallpaper in both areas
- Spackled cracks & holes
- Caulked all of the trim
- Primed and painted trim, walls, and ceiling
- Replaced all of the cabinet & drawer knobs with new pulls
- Removed cellular blinds and curtains, replaced with a roman shade
- Removed the dining area chandelier and replaced with modern light
- Removed old can lighting and replaced with LED can lighting
- Cut a hole in the wall and installed a sliding patio door! (Then added trim, primed, painted, added curtains, and transition piece)
- There’s also a new electrical plate for the deck lighting and fan
Still to do … seal the counters, re-caulk a few areas, new appliances & new countertops, new faucet, and maybe install a backsplash? … oh, and hem the curtains.


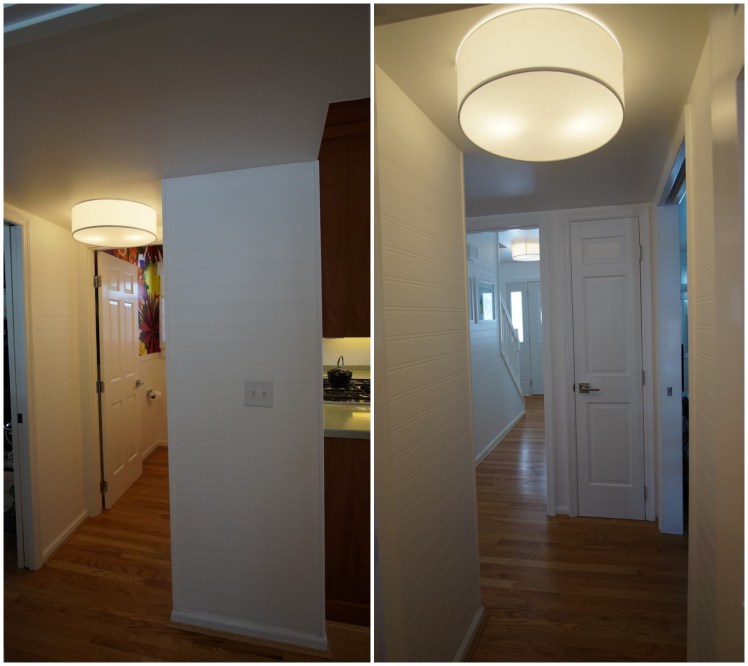
Hallway area
- Cut a hole in the wall and installed a pocket door between the hallway and den
- Removed the wallpaper
- Spackled cracks & holes
- Caulked all of the trim
- Installed wallpaper & corner trim pieces
- Installed pocket door trim
- Primed and painted trim, walls, ceiling, & doors (basement & pantry closet)
- Installed new door hardware – hinges & levers
- Installed new pocket door hardware
Still to do … Paint inside the pocket door latch hardware
½ Bathroom
- Demoed the entire bathroom – removed sink, vanity, toilet, & curtains
- Stripped the wallpaper
- Spackled cracks & holes
- Caulked all of the trim
- Fixed large holes where previous in-wall TP holder and medicine cabinet were installed
- Wallpapered both the bottom & top half, as well as the soffit above the sink
- Added chair rail and trim around the soffit
- Primed and painted trim, walls, and ceiling
- Replaced the sconce light with a new light fixture
- Installed new toilet, pedestal sink, and faucet (& had some plumbing replaced in the process)
- Removed curtain and replaced with roman shade
- Painted the door and installed new hardware – hinges & lever
- Painted and installed new mirror
- Installed all new bathroom accessories – towel holder, TP holder, etc.
Still to do … re-caulk chair rail, install escutcheon plate under faucet, fix door trim (where it was cut out for previous vanity top)


Den
- Spackled cracks & holes
- Caulked all of the trim
- Spray painted the fireplace insert with high-heat, matte-black paint
- Primed and painted all of the trim, walls, and ceiling
- Removed heavy draperies, and cellular blinds, and replaced with roman shades
- Painted the fireplace bricks a high-gloss black
Still to do … Paint the wall behind the projector screen (due to other “plans” for this room … I only primed the wall beforehand, so now painting will just be done when we move the den to the basement)


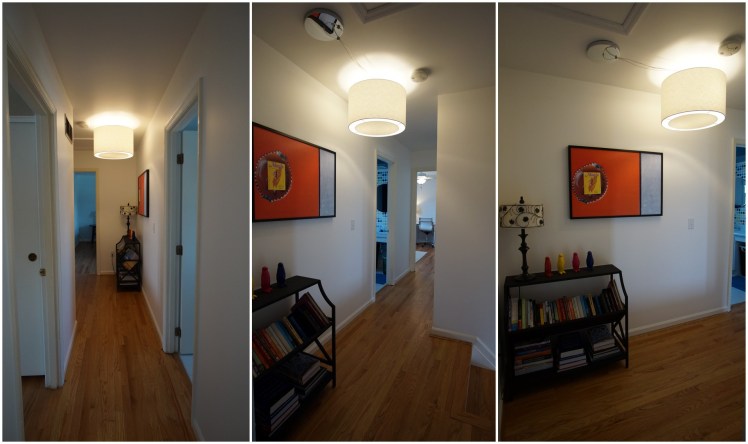
Stairwell & Upstairs Hallway
- Removed all of the wallpaper & mudded the walls in the stairwell
- Spackled cracks & holes
- Caulked all of the trim
- Painted the stair fronts & installed oak trim
- Primed and painted all of the trim (stairwell only), walls, and ceiling
- Replaced hallway light with new light fixture
- Hung art
Still to do … Re-caulk some on the stairwell; paint all of the doorway trim in the upstairs hallway; paint all of the upstairs doors & replace all of the hardware

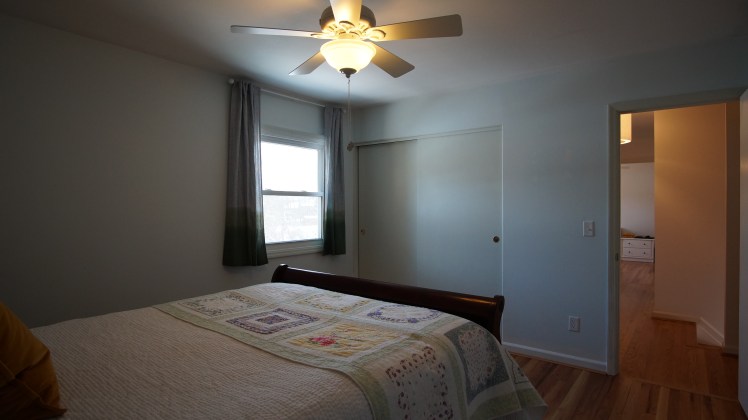
Guest Bedrooms (I’m lumping these 2 rooms together because both have had the exact same work done already – and both are getting the exact same renovations in the upcoming months)
- Spackled cracks & holes
- Caulked all of the trim
- Primed inside of closets
- Primed and painted all of the baseboards
- Hung new curtains
Still to do … Prime & paint the walls, add trim around the room, paint the closet & bedroom doors, install new hardware, hang art … and maybe new light bowls for the ceiling fans

Office
- Spackled cracks & holes
- Caulked all of the trim
- Primed inside both of the closets
- Primed and painted all of the baseboards
- Hung new curtains
Still to do … Prime & paint the walls, install built-in bookshelves, paint the closet & office doors, install new hardware, hang art … and maybe a new light bowl for the ceiling fans


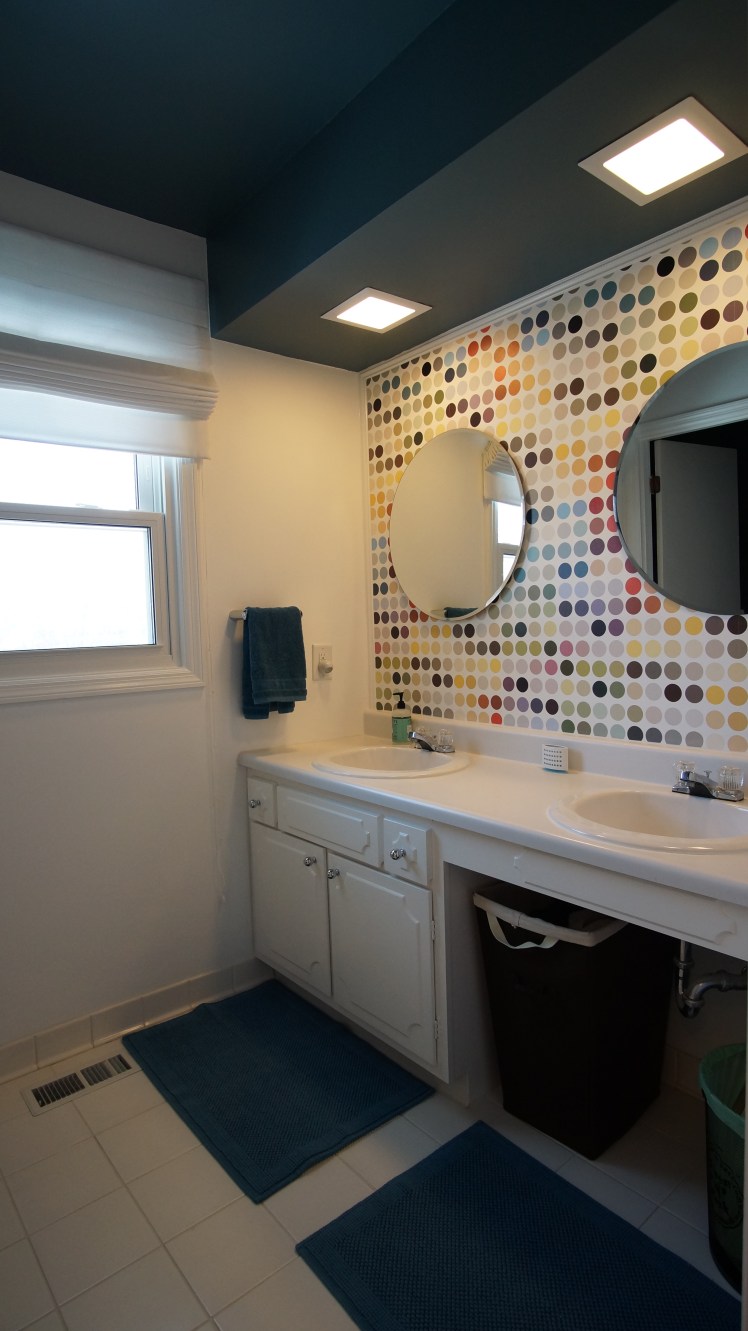
Full Bathroom
- Removed all of the wallpaper in both rooms
- Spackled cracks & holes
- Caulked all of the trim
- Mudded walls where needed
- Installed a new toilet
- Installed wallpaper liner, and then wallpapered behind the sinks
- Installed new trim
- Built-in shelf to replace original medicine cabinet
- Primed and painted the trim, walls, and ceilings
- Painted vanity and replaced all of the knobs
- Hung new mirrors
- Replaced square can lighting covers
- Installed a new shower curtain rod
- Installed new TP holder, towel bars, etc.
- Replaced curtains with new roman shade
Still to do … Prime & paint the doors, install new door hardware & levers, replace some plumbing and install new faucets … and hang some art or something on the blank walls (not sure what yet, but it’ll come to me) … and maybe long term, replace the vanity & sinks … or just remodel the entire bathroom? (Oh, and in the meantime, I HAVE to fix the built-in shelf … it’s not poorly constructed at the moment and it really bothers me. 😐)


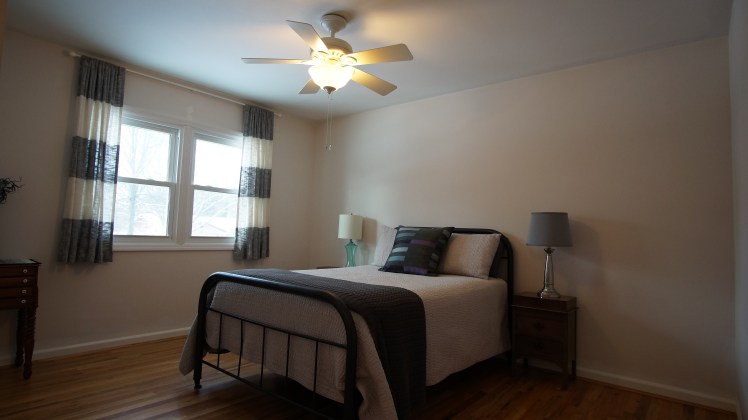
Master Bedroom
- Spackled cracks & holes
- Caulked all of the trim
- Primed inside of closets
- Primed and painted all of the trim, walls, and ceiling
- Hung new curtains
- Plus, new bed, mattresses, & dressers
- Hung mirror and some art
- Also, removed super inconvenient closet door & replaced with curtain & installed LED lights, for now
Still to do … Add trim around the room, paint the closet & bedroom doors, install new hardware, hang art … and a whole new ceiling fan/light. 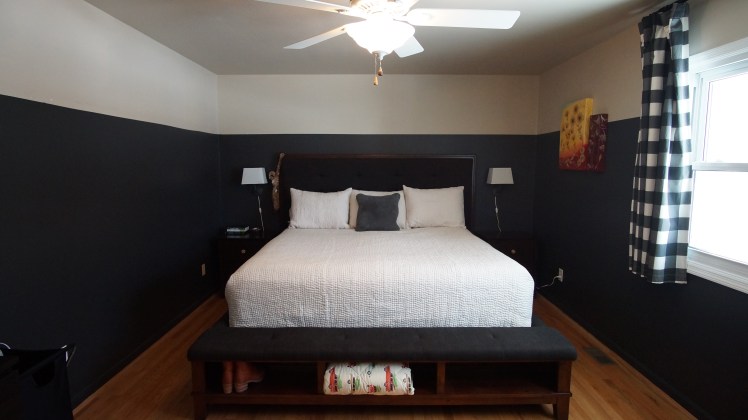


Master Bathroom
- Primed inside of the linen closet & added lining to all of the shelving
- Installed a second towel ring by the sink
- Installed a new toilet
- Replaced old can lighting with new LED can lighting above the sink
- Hung temporary curtains
Still to do … EVERYTHING … we’re weighing our options with this one … do we improve on what’s already there, or do we gut the whole room and start over? At the very minimum, we want to remove the wallpaper, prime & paint, install a double vanity with 2 sinks, re-tile the shower stall, install new shower doors, along with new light fixtures throughout and replacing the french doors that lead into the bathroom with a single, normal door … and maybe replace the flooring also. 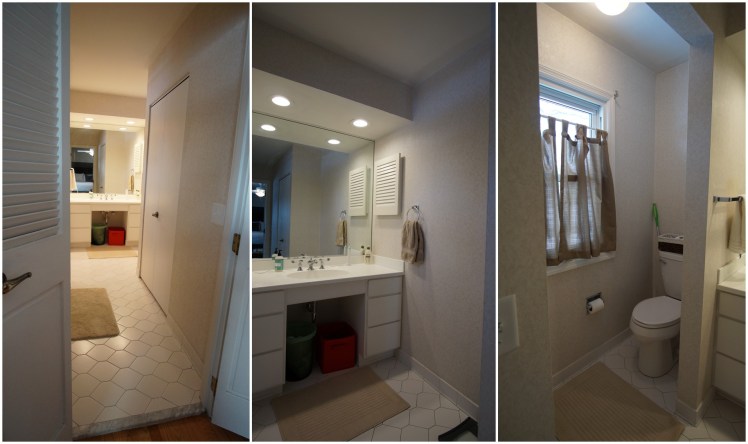
Basement
- Cleaned it out
- Additional lateral waterproofing installed
- Set-up a workout space and bought new flooring
- Set up shelving and storage area
Still to do … Finish the space on the south end of the basement – so we’ll move laundry to the north side, add drywall, flooring, drywall the ceiling, add a bathroom, new lighting, etc. The same contractor who built our deck will be renovating our basement, but he’s on a project that literally went from ‘adding a 3-season room’ to a ‘full-fledge, 2-story, bigger kitchen, oh, and-add a bathroom too’ addition on the house … so it might be a few months?


Garage
- Cleaned it out
- Bought some new shelving units
Still to do … Prime & paint the walls (maybe?), seal a few areas around the door & foundation, maybe paint the garage door, and add a workstation/tool storage area – not sure if this will be built-in or just a purchased, modular system yet … but sometime next summer, we’ll empty out the garage and fix it up nicely. It’s pretty high on my list because parking indoors has been AMAZING, like surprisingly fantastic!

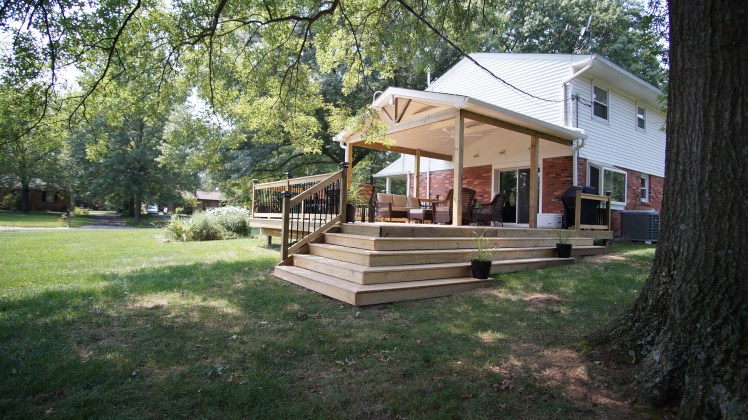
Outside
- Oh, we just added a large deck, no big deal, 😀 – where we also removed some split-rail fencing, a whole bunch of landscaping/garden area, and removed some very large, overgrown honeysuckle plants.
- Began fertilizing and re-cultivating the grass (parts of it were/are in bad shape)
- Also, new furniture, dining table, and grill
Still to do … Everything else. Seriously, we need to re-landscape the entire yard, add some privacy shrubs in front of the new deck, remove the backyard patio and replace with a matching deck, possibly extend the privacy fence to the end of our yard, and get rid of these randomly placed flower beds in the middle of the yards? Also, at some point we need to fix the front porch. Due to some settling, the front porch has some cracks in the concrete and portions of it have dropped, and one of the pillars is shimmed up. I also have to re-mortar some brick areas where the settling occurred. It’s not urgent, but it’s also something we have to keep an eye on … it won’t happen overnight, but always better to do the preventive maintenance and keep things up.


BEFORE & AFTER
And, now … here are the before & after pics! The first picture is the real estate picture, taken by the seller, posted to the listing when we first bought the house (OR … a pic taken by me right after we bought the house because some rooms weren’t pictured on the listing and I wanted the befores to be thorough 😊) … the afters were taken this morning (or in the case of outside pics, this past summer after the deck was built).
[Again, if you aren’t interested in clicking through a slideshow … I’ve also updated the Cincinnati Home Tour page, where you can scroll through the before & afters, just click here.]
