***I’m so far behind on updating this blog. Much this work was completed in September and October. We were on vacation for literally 2/3 of November, and then it was Thanksgiving. But, I’ve been hard at work and getting stuff done. I really want to see how far I can get by the 1-year mark, which is quickly approaching. So, for the next few weeks, you can expect a whole bunch of details and finishing work coming at ya’ll … but probably not more than 1 or 2 fully-finished, updated whole rooms. (That’s my optimistic viewpoint shining through there … I might not get much done and you might only see a couple more posts before the 1-year mark. But, either way, stay tuned!)***
So, really there was no interior deck work … but there was a descent amount of interior work to be completed after the deck was built.
Since there was no door there previously when we had the deck built, the wall in the kitchen eating area was a bit of a mess. It needed to be spackled, sanded, primed, and painted. The trim needed to be spackled, caulked, primed, and painted. The shoe molding needed to be cut and re-installed. The floor needed a transition piece next to the door. A curtain needed to be installed (which was more complicated than it should have been). Then, the curtains needed to be adjusted and hung (also more complicated than it should have been … and still not completely completed).
I just tackled the rest of this project this month (edit: October). And, everything is done now (almost). It makes the entire area seem bigger and more open. We’re one step closer to having the main floor completed. (yay!)
So here’s how things went down.
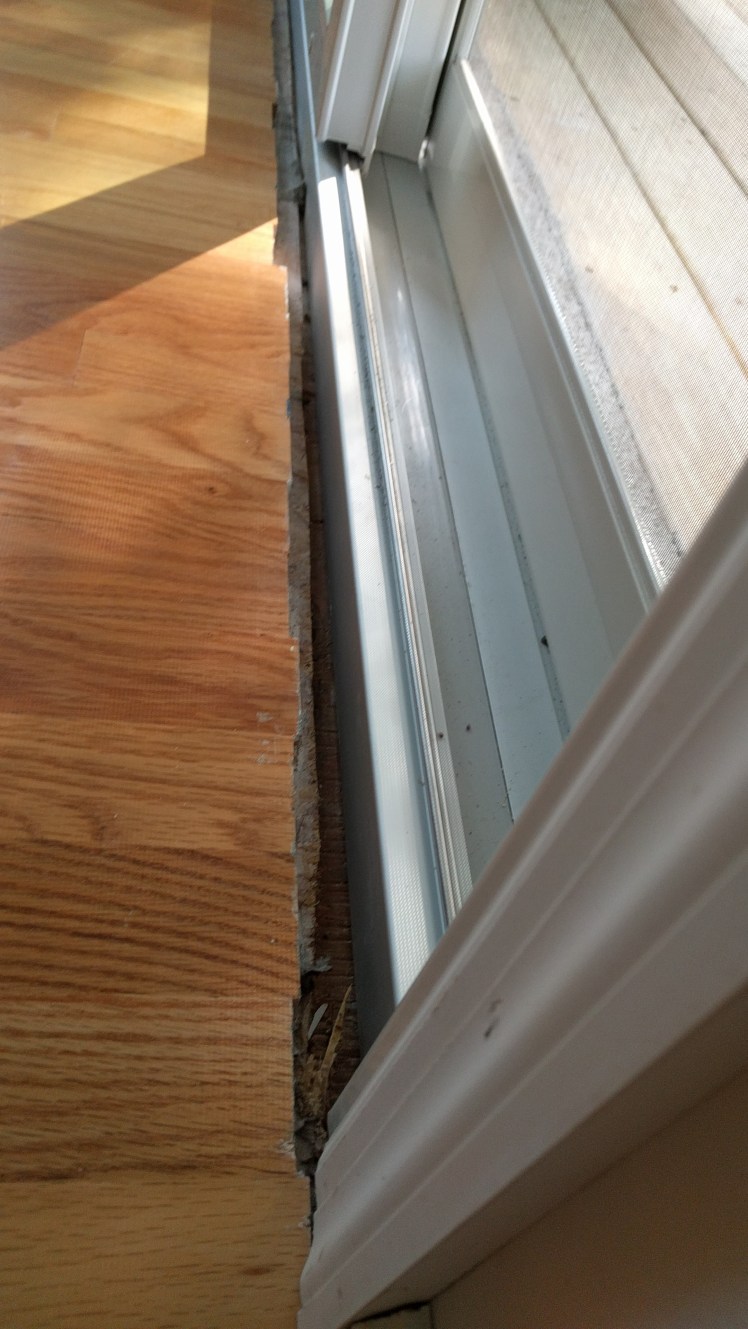
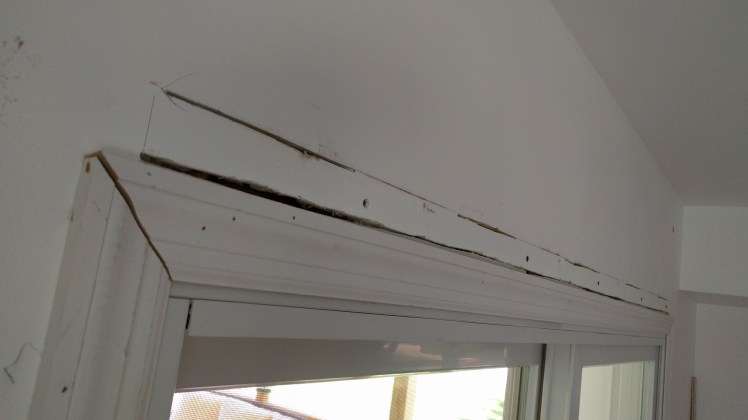
When Dan installed the patio door, he sent his drywall guy over to mud and sand the large hole along the top of the door. His guy did a great job, and we learned more about legit drywall work, which is handy in this house. But, after that work was finished, we were left with a door, with half-installed trim, pulled-off shoe molding, mudded walls, and a hole in the floor between where the wood floor planks end and the door frame begins. Just a bunch of little things that aren’t cohesive enough to tackle as a single project. And, just enough small jobs that each take less than an hour, but trying to do them all at once adds up to an entire day or more of miniscule tasks. (It took me more than a day.)

First up was getting some curtains. At night, basically anyone on the road or walking down our street can see right into our house, quite a bit, because of where the door is and how our house is situated on the lot. So, we needed some privacy. This could easily be considered our biggest headache of the whole entire project. (And also, the part that still isn’t completely completed yet, as of today, December 3).
I COULD NOT find an 8-foot-long curtain rod that also didn’t have a center support. See, we have a soffit on the one side of the door. Soooo, not that I would have ever done it this way, but even if you wanted to, you couldn’t hang 2 curtains that pull to the left & right like a normal window, because then the right-hand curtain would always be in the way when people were trying to go in and out the patio door. Plus, all of the outside light and fan switches are over there, so the curtain would just hang in front of those. Dumb. Hence, no center-support mount on the curtain rod because I needed to be able to pull them all the way across from left to right. This was the first of many headaches. (I actually even ordered a curtain rod with rings and went so far as to start installing it before Patrick looked at me and said, “I thought you couldn’t use a rod with a center support?” This renovation has literally made my brain mush. Like, I literally told him about the center support conundrum, and then just went ahead and ordered a normal curtain rod. WTF? And returning that rod was a HUGE hassle with West Elm. HUGE HASSLE.)
So, we talked about ordering roman shades. They would have matched the rest of the downstairs window coverings and blended right in. But, 1 huge shade seemed like TOO much and way TOO heavy. But, 2 shades seemed like a pain in the rear-end, and would have had to be hung much higher than the rest of the downstairs shades because they would need to clear the top of the door. Plus, white shades, hanging all the way to the floor, seemed like they might get dirty and not look the best after a little while. Sooooo, those were out too.
Then, I moved on to traversing rods. This was a great idea … except that traversing rods *mostly* look like they belong in my great-grandma’s Victorian mansion that’s kind-of cobweb-y and might smell a little. (I know you can all picture what I’m explaining here – don’t pretend you can’t.) And, well that definitely does NOT fit into the modern, clean, linear look we have going on in this house.
So, I went back and forth on the shades and traversing rods for a while. I looked at ordering a curtain to match the shades on the main level from the same shop – but that was going to be crazy expensive and also way fuller than I was looking for, so I didn’t want that either. It was just a huge and constant nagging conundrum.
FINALLY, I found a traversing rod that I liked and matched our décor well. And bonus, it was relatively cheap. And, once I ordered the rod, we went to the store to look at the curtains I wanted to order, just to see them first. I was on the fence about the purchase because typically I would never spend that kind of money on curtains, but I was so over this whole project (and well, sometimes you just have to throw some money at a problem). Also, I’ve never seen Patrick plead to me to just pay the money for something so “just functional” either. He was also just done.
Recap. Now the rod was ordered, arrived, and hung. The curtains are hung. We have privacy.
But, this solution, while functional and I do like where we ended up – the rod, curtains, etc. – has not been without it’s struggles as well. (Still ongoing struggles …)
Even though we really liked the curtains (and there are 2, because we bought regular curtains, 2 panels, which will eventually need to be sewn into 1 panel), they were not made for traversing rods – they just had rod tabs in the back. So, initially I just stabbed some drapery hooks in there and called it a day – I needed to get those curtains up! But, they were floppy and looked messy – they needed some support up there. So, after some more thought, and bouncing some ideas around and off of my mom, I added buckram heading and pleater tape. It worked great. I just used some fabric glue to attach the header and tape. The pinch pleat hooks also went in perfectly and looked exactly as I wanted them too. I was so excited.
Then I hung them. And, well, because the rod is actually rectangular, and the plastic clips that hold the drapery hooks are custom and just hang straight down from the bottom of the rod, the pleated drapery hooks interfered with the curtain rod and didn’t work. So sad. I pulled all of those hooks out, pulled that pleater tape off, and now I’m down to just the stiffener. I even went BACK to the store AGAIN, and bought offset hangers, hoping to slide those into the rod and allow the curtains to traverse in front of it – no luck. Since the rail is rectangular, the standard offset hooks don’t fit into the opening. So, again, I had to just get the curtains back up there; so there they are, both with stiff headers, so at least they look better and not so messy, but still not what I was after.
Also, they need to be hemmed. (I know that pooling is a thing – it is just most definitely not my thing.) And, perhaps hemming them will help them hang a little better from the drapery hooks … but I’m so nervous to hem the curtains because what if they aren’t positioned on the rod correctly yet … so I’m frozen now. I KNOW the next step is to actually hem the curtains and allow them to hang freely without pooling on the floor, and then make adjustments as needed … but remember how expensive they were? Well, anyway, that’s a whole other project, for a whole other day.
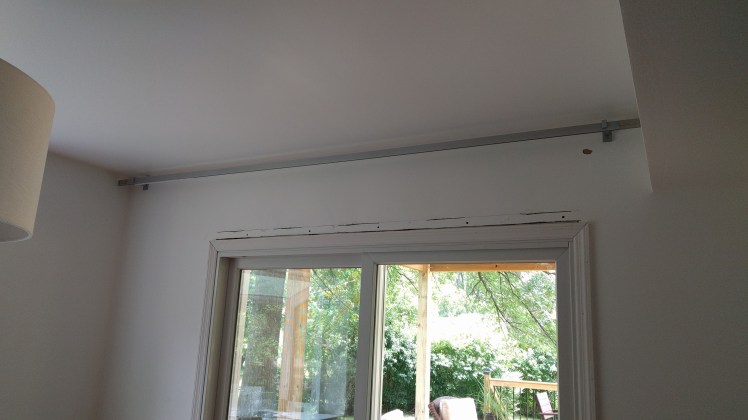
Previous (the first 3 pics were not a good situation) & current situation of the curtains (last picture is where they stand now, better but not great):


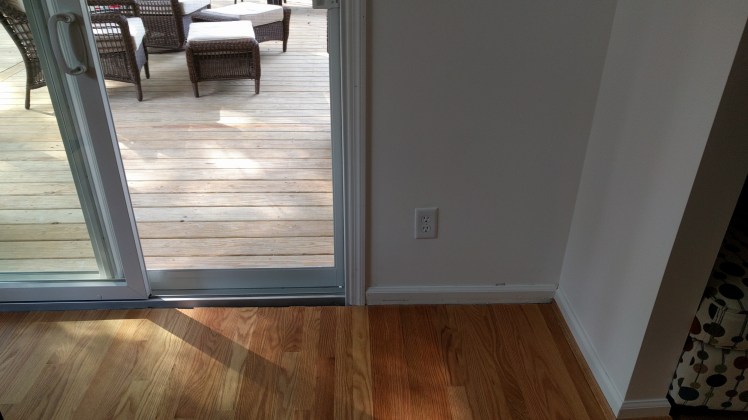
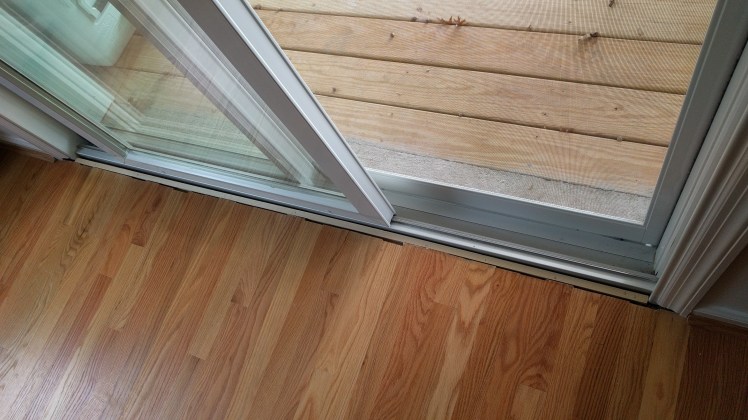
Next up (back in October) was the transition piece that covers the end of the floor planks up to the door frame. This turned into a headache – because weirdly enough, they don’t sell transition pieces like they do trim. We looked at 3 different home improvement stores, and all of them carried the normal 3’ and 6’ length transition pieces. Also, weirdly enough, all of the transition pieces are angled on both sides, since they are made to transition between two rooms, instead of up against an exterior door. But, seriously, we went 3 different places, and talked to countless humans, and, well, all of them suggested the same thing – rip cut the second angle off of the normal transition pieces. (Or one guy said to router the angle onto a regular board.) However, I’m afraid that we don’t have the tools for either of those tasks … and although I think that I could do both and that I’d actually be pretty good at it … well, the number of projects still cascading down our to-do list does not really encourage buying new tools and honing new, meticulous skills … right now anyway.
So, we bought a 6’ transition piece in red oak, with angles on both sides, and just made it work. Now that it’s installed, well, seriously, unless we pointed it out (which I’m doing right now), it’s once again something that NO ONE will ever notice, but I’ll know it wasn’t done quite correctly. Oh well. Our last house filled up with those things and so will this house.
I had to cut the trim and the transition piece – little cuts out of each – to get it to sit flush with the wall and the interior of the doorway. That was super easy and turned out really well. Then I had to install a gap board to fill the hole that was between where the floor & drywall originally met and where the door frame was then installed – so that the transition piece had substance behind it. Then I stained the board to match the floors … and, well, of course the screws that came with the transition piece were not long enough to meet the subfloor, so we had to run out and buy new screws. But, now it’s done and looks finished.
Oh, and the shoe molding got cut and re-installed on either side of the door.


The trim and walls were painted. Along with the ceiling where the old light fixture used to hang. (They had their light fixture pulled way off to one side of the kitchen on a hook. We centered ours over the table.)


And, so now, the only thing left to do is find a switch plate cover (see it not covered in that last picture?). Menards sells switch plate covers that you can snap together to form any sort of combination you want. So, like you can buy 2 light switches, 1 outlet, and 1 rectangular dimmer cover – and then they snap together and screw on like a normal cover. But, the fan control module is just too bulky and doesn’t fit in a normal cover … so I think I’m going to have to order a wooden one and sand that out a bit to make it fit. Sounds fun, so I’ve been really anxiously anticipating that project and not putting it off at all. Like, not even for 3+ months now.
So, the post title was not really accurate. It’s more like, Partially Completed Interior Deck Work. But, hey, at least we’re working on it, right?
